The following steps show you how to create your own custom shaped iridescent vinyl sticker designs using Adobe Illustrator.
1. Download our sticker templates
Download our sticker templates >> here << and open your chosen sticker size.

2. Importing your Artwork
Select the 'Artwork' layer in your layers palette and either draw your design directly into this layer or copy (CTRL+C) and paste (CTRL+V) previously saved artwork.
Please don't rename existing layers or create additional layers as this will confuse our systems when processing your designs.
All design elements on your 'Artwork' layer MUST be grouped together before submission to prevent any data loss when we are tiling your stickers.

2. Working with white ink
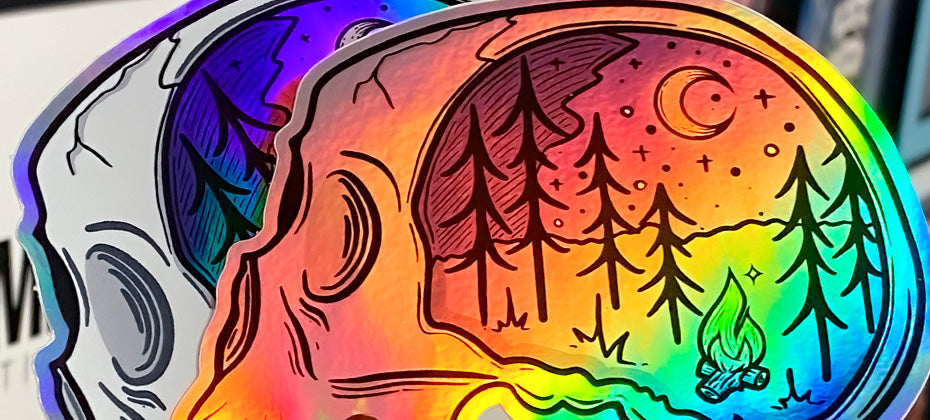
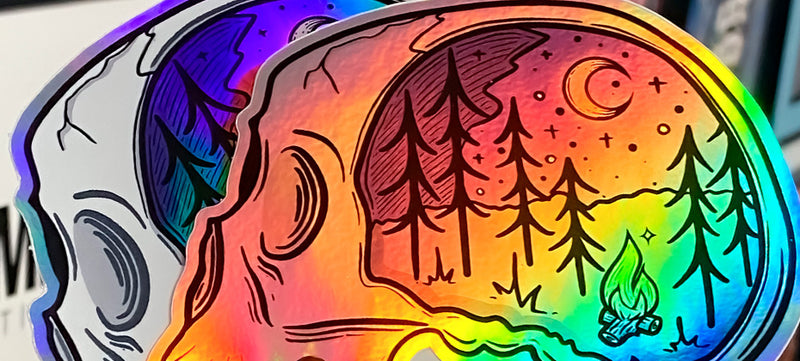
Our coloured inks are translucent and require a base layer of white ink to make them appear opaque. White ink can also be used to mask the iridescent nature of our iridescent vinyl, to create awesome effects. Here's how it works...
- Areas of coloured ink with a base layer of white ink will appear coloured opaque and will fully mask the iridescent effect of the vinyl.
- Areas of coloured ink without a base layer of white ink will appear coloured iridescent.
- Areas with only white ink will appear white and will fully mask the iridescent effect of the vinyl.
- Areas with no coloured ink and no white white ink will appear silver iridescent.
To create white areas for your stickers, select the 'White' layer and add any details where you would like to see white ink on your stickers.
Colour these areas 100% cyan so that we can clearly see them when checking your designs. Any cyan areas on your 'White' layer will be printed white on your clear vinyl stickers.

All design elements on your 'White' layer MUST be grouped together before submission to prevent any data loss when we are tiling your stickers..
3. Creating your Cut Lines
Show us where you would like your stickers to be cut by creating a red path with a weight of 0.25pt on your 'Cut Lines' layer.
Your iridescent stickers must have a border of at least 2mm between the artwork and the cutline.
.
TOP TIP: To get the most out of your custom shaped stickers we recommend avoiding cut lines with large switch backs and cut elements thinner than 5mm as these will be very fragile once your stickers have been cut out.
The following design is a good example of this. The cats whiskers would be too thin and complex and would result in a fragile sticker.

Where designs contain switch backs and thin elements such as whiskers or strands of hair, we would always recommend increasing your border thickness so that your stickers are more durable.

If in doubt, contact our admin team with any questions or concerns and we will be happy to help.
Please don't rename existing layers or create additional layers as this will confuse our systems when processing your designs.
If you have used any effects / layer styles on any of your layers you MUST flatten them before saving. To do this simply right click on the applicable layer and select 'Rasterize Layer Style' from the menu.

4. Saving and submitting your designs
There are 3 different ways to save and submit your designs...
1. Submit your artwork immediately
If you have already created your designs, you can send them to us using the 'Upload Artwork' button, located on our product pages or by emailing them to ‘info@zapcreatives.com’.
Save all Illustrator files in .Ai format. Here’s how…
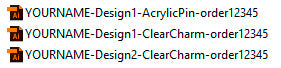
Name each of your designs appropriately so that we know which designs you are referring to. Your file names should include 1. your name, 2. design number, 3. chosen product and 4. the date that you placed your order through our website. Here’s an example…

Select all of the designs that you would like to submit, right click and choose SEND TO > COMPRESSED (ZIPPED) FOLDER.

This will create a compressed folder containing all of your designs. Rename this folder so that it contains your name and the date that you placed your order on our website. Like this…

Please add all of your designs into one folder. So, if you purchased charms, stickers and pins, for example, just pop them all in the same, compressed folder and pass it our way.
2. Submit your artwork later
If you have placed your order via our website but your designs aren’t quite ready yet, that’s ok. You have up to 2 weeks to submit your artwork to us, which allows you to take advantage of any special offers that we’re running.
To submit your designs later, save them with 1. your name, 2. design number, 3. chosen product and 4. your order number. Then email them to ‘info@zapcreatives.com’.
Save all Illustrator files in .Ai format. Here’s how…
3. Placing a re-order
If you have placed an order in the past and would like to re-order those designs that’s great! We store your artwork for a maximum of 6 months, which saves you the hassle of having to resubmit your designs via email.
To place a re-order, simply place your order online, email us with your previous order number(s) and let us know that you are placing a re-order.
You may only want to order 1 or 2 designs from your previous order(s). To do this simply quote your old file name(s) and let us know how you would like them to be produced and in what quantities.
Here’s how to do it…
Hi Zap!,
I’ve just placed an order #12345 on your website and would like to re-order the following designs from a previous order #12121. Please can I have…
10x [YOURNAME]-DESIGN1-IRIDESCENTSTICKERS-12121
20x [YOURNAME]-DESIGN2-IRIDESCENTSTICKERS-12121
10x [YOURNAME]-DESIGN3-IRIDESCENTSTICKERS-12121
Thanks!
[YOUR NAME]
If you have any questions about this tutorial or any other aspects of our website and manufacturing processes, please do not hesitate to get in touch. We’d love to hear from you.